


"Here to Help" is a support column written especially for Formstack's awesome, loyal customers.
The appearance of your online form can make or break its performance. And I’m not just talking about the fancy online form design elements like fonts, colors, and images. I’m talking about the overall structure of your form fields.Did you know that you can tweak your form layout by adding up to four columns? It’s true! Organizing fields into multiple columns can help you condense your form and streamline its overall appearance for a better user experience.By default, Formstack online forms are one column. But it’s super easy to change that! Just follow the brief steps below to create an online form with a multi-column layout:
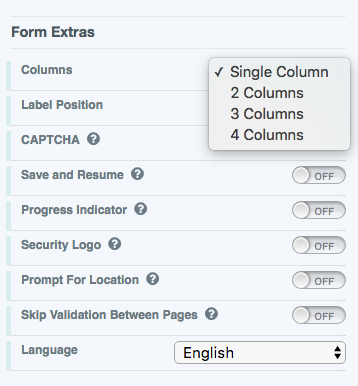
Step 1: Set Number of Columns
To select the number of columns you want your online form to have, go into your form and take the following actions:
- Scroll to Form Extras on the left side of the builder.
- Locate the Columns area and choose your desired number of columns from the dropdown list.
Note: Your form cannot have more than four columns.
Step 2: Organize Form Fields Accordingly
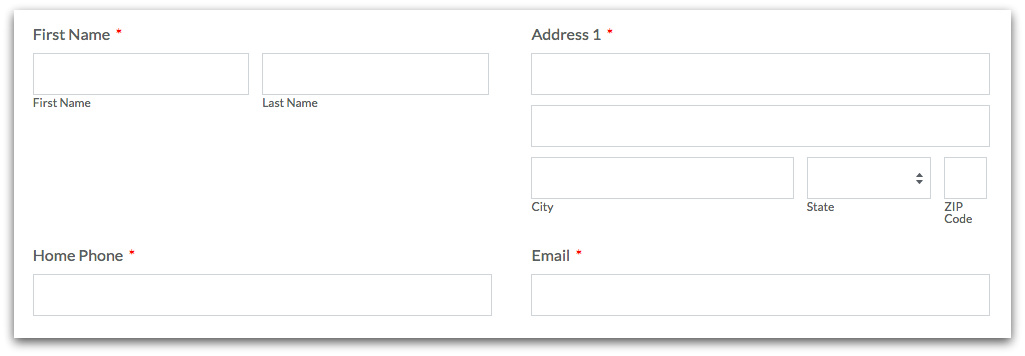
Once you’ve set your desired number of columns, you may need to move your form fields around or update them a bit for the best visual outcome. There are two common reasons to reorganize your form fields after setting up columns:
- To even things up if a long form field (like an Address field) is used next to a short form field (like an Email Address field)
- To stretch one field across multiple columns if you have less fields than columns in an area of your form (or to even things up as described above)
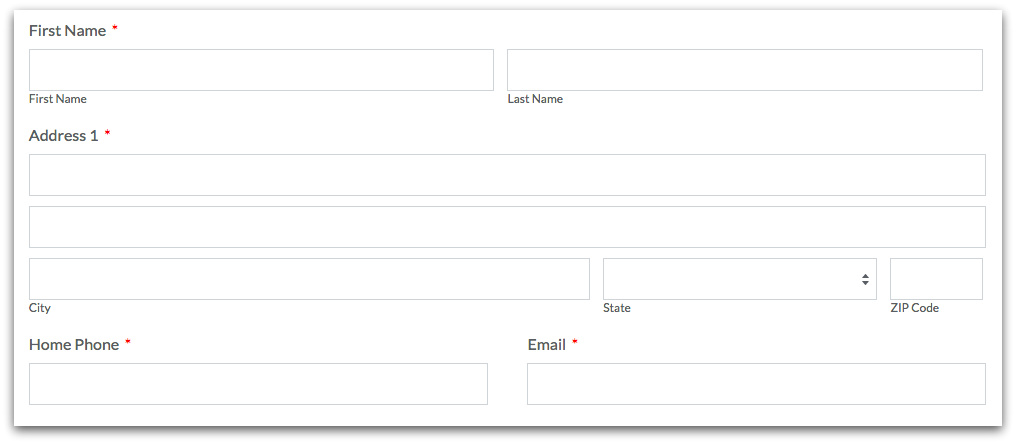
For example, adding columns to your online form might leave you with something that looks like this:
To even things up a bit, you can simply drag and drop the fields until you get a more desirable look:
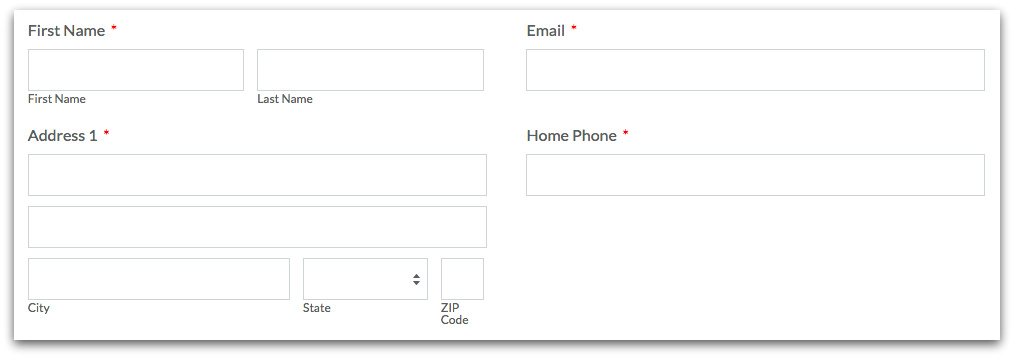
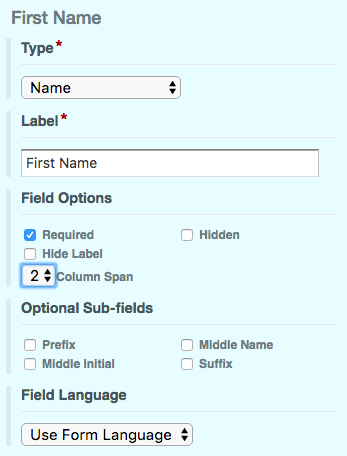
You can also stretch fields across columns to improve symmetry. To do this, simply click on the field you want to stretch, find the Column Span dropdown list in the Field Options section of the builder, and select how many columns you want the field to cover.
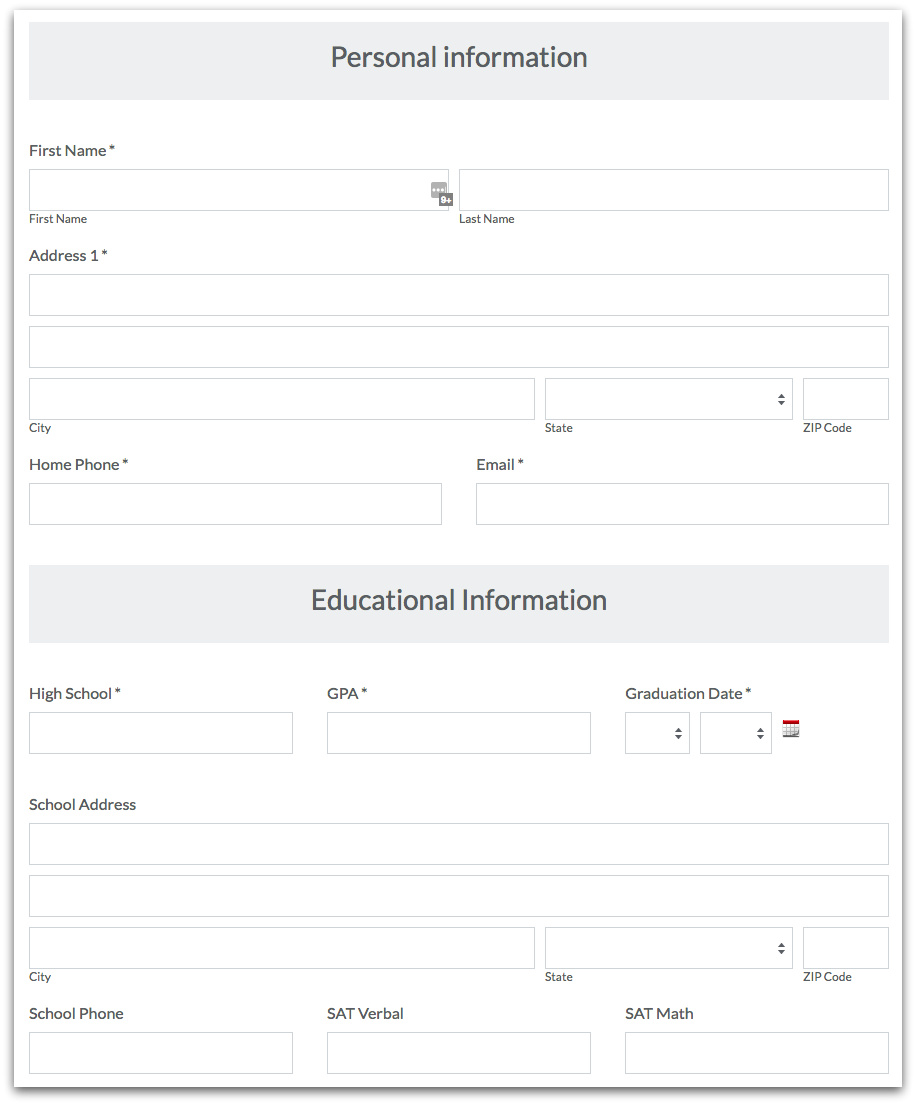
Using the example above, we can stretch the Name and Address fields across our two columns to improve the overall look of our form:
Step 3: Add Sections to Vary Number of Columns
If you want to vary the number of columns in your online form (so that, for instance, some fields are organized into two columns by default while others are organized into three columns by default), you can set this up using Sections.When you add a new Section to your form, you will see a Columns area in your Section options on the left side of the builder. Use the Columns dropdown list to set a specific number of columns for that section.

Here’s an example of how an online form can look with multiple sections and a multi-column layout:
That’s all there is to it! As you can see, Formstack makes it easy for you to design custom online forms. And our Theme Editor offers even more form design capabilities. Click here to learn more.

